- 系统
- 教程
- 软件
- 安卓
时间:2021-12-06 来源:u小马 访问:次
为什么我面临这个错误?如果您在 Windows 11 期间绕过了安装检查,那么这就是您在更新 Windows 时遇到此错误的原因。以前绕过 Windows 11 安装检查的方法不再适用,无论是使用不同的 .dll 文件、使用脚本还是自己编辑 ISO。
这是对 Insider 版本的新更新,其中 Microsoft 正在积极阻止任何绕过工具并最大程度地执行安装要求。这就是您在 Insider 频道上尝试更新到最新版本的 Windows 11 时遇到 0x80888002 错误的原因。
您可以在更新 Windows 11 时使用可帮助您绕过这些检查的自定义脚本修复此错误。这个由社区开发的新脚本使用不同的解决方法来帮助您绕过系统上的 Windows 11 要求。使用此脚本将帮助您修复此错误并在您的 PC 上安装适用于 Windows 11 (v22509) 的最新 Insider 版本。
访问上面的链接,您将被带到脚本的 Github 页面。现在单击右上角的“代码”并选择“下载 ZIP”。
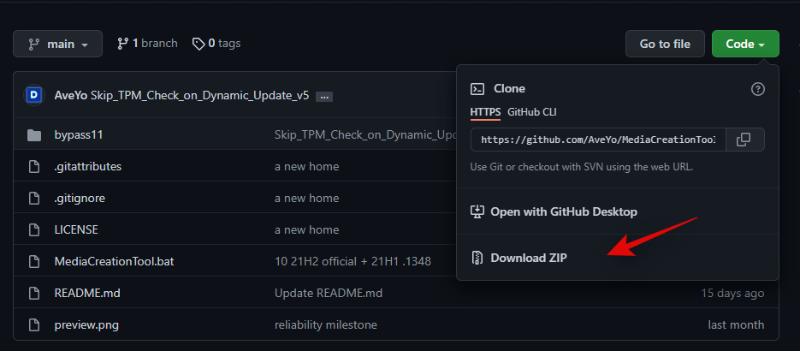
一个 .zip 文件现在将下载到您的本地存储,只需将文件内容解压缩到一个方便的文件夹中。
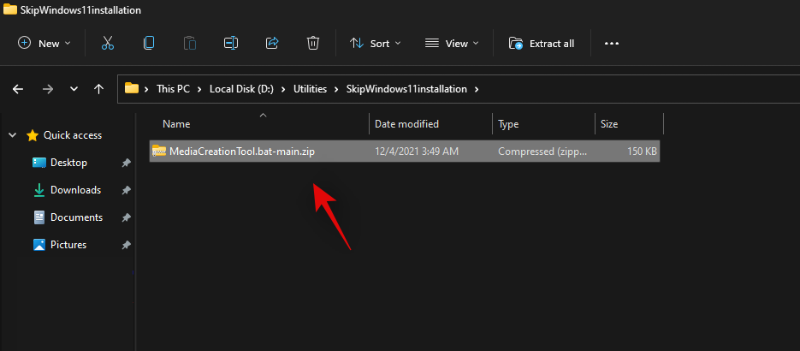
解压缩后,打开文件夹,双击并打开“bypass11”。
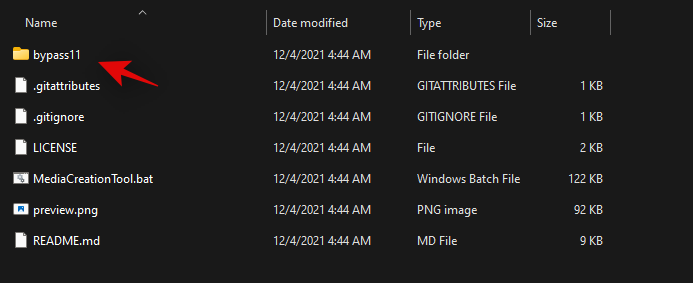
注意:我们假设您已经在运行最后一个 Windows 11 Insider 版本,因为在最新功能更新期间尝试绕过要求时会遇到此 0x80888002 错误,因为新检查之前已经绕过它们。但是,如果您尚未注册 Insider 频道,那么您首先需要“OfflineInsiderEnroll”工具来帮助您入门。
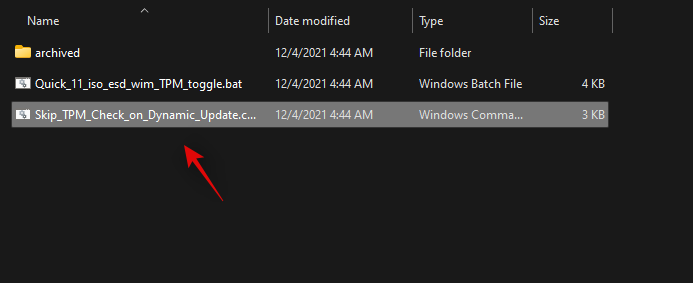
现在双击并启动脚本“Skip_TPM_Check_on_Dynamic_Update.cmd”。
确认您的选择以通过 UAC。
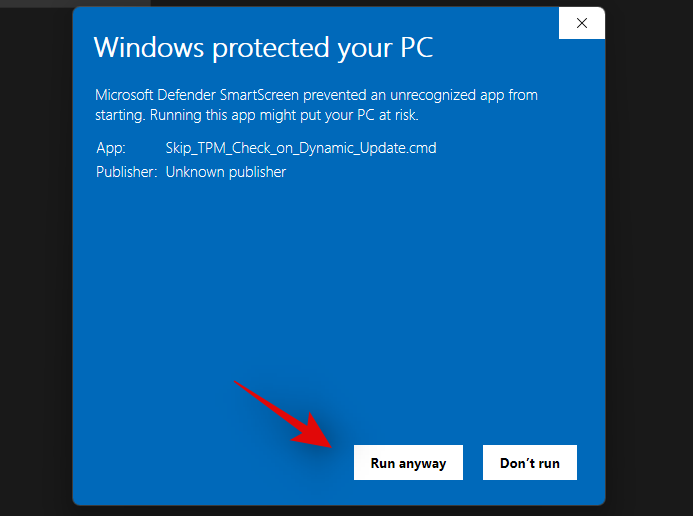
当 PowerShell 窗口启动时,按下键盘上的一个键,系统会提示您进行相同的操作。首次运行脚本时,顶部的免责声明应为绿色。

这些更改现在将自动应用于您的 PC。您现在可以按预期升级您的系统,并且您的系统将不再出现 0x80888002 错误。
我们建议您在更新系统后还原此脚本所做的更改。要恢复更改,请再次双击“Skip_TPM_Check_on_Dynamic_Update.cmd”。这次免责声明应该在顶部是红色的。只需按下键盘上的一个键即可恢复对系统所做的更改。

一旦必要的更改恢复到您的系统,脚本将自动关闭。就是这样!您现在可以按预期继续使用您的 PC,而不会出现任何问题。
首先用户需要下载旧版的自动屏蔽PTM 2.0工具,并在检查更新的时候选择开启。
在开始检查更新的时候,打开电脑C盘可以看到多出来两个文件夹,打开$WINDOWS.~BTSources
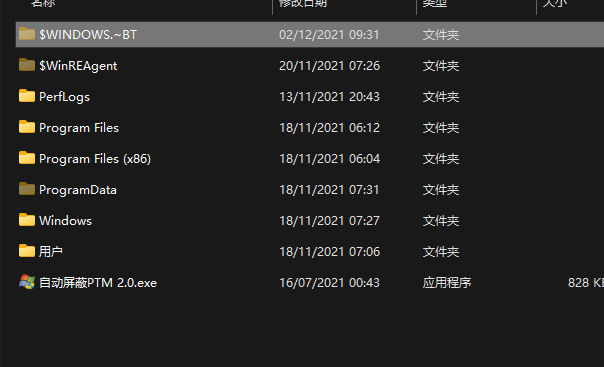
当自动更新到8%的时候,将C:$WINDOWS.~BTSources文件夹中【AppraiserRes. dll】文件删除即可。
电脑桌面新建一个文本文档,后缀名改为.cmd文件。
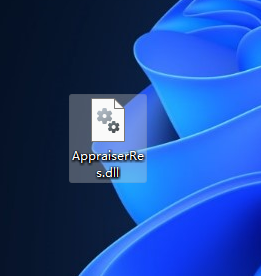
更改后,复制以下代码进入文件中并保存。
@(set "0=%~f0"^)#) & powershell -nop -c iex([io.file]::ReadAllText($env:0)) & exit/b
#:: double-click to run or just copy-paste into powershell - it's a standalone hybrid script
#:: v1 of the toggle script works perfectly fine for most people with a non-botched windows installation
#:: uses a fast, fileless wmi subscription to watch for the Virtual Disk Service Loader process running during setup,
#:: then launches a cmd erase of appraiserres.dll - that's all there is to it, no rocket science, just a great implementation
#:: you probably don't need to have it installed at all times - just when doing feature updates or manual setup within windows
#:: hence the on off toggle just by running the script again

$_Paste_in_Powershell = {
$N = 'Skip TPM Check on Dynamic Update';$off = $false
$0 = sp 'HKLM:SYSTEMSetupMoSetup' 'AllowUpgradesWithUnsupportedTPMOrCPU' 1 -type dword -force -ea 0
$0 = ri 'HKLM:SOFTWAREMicrosoftWindows NTCurrentVersionImage File Execution Optionsvdsldr.exe' -force -ea 0
$0 = sc.exe config Winmgmt start= demand; sp HKLM:SOFTWAREMicrosoftWbem 'Enable Costly Providers' 0 -type dword -force -ea 0
$B = gwmi -Class __FilterToConsumerBinding -Namespace 'rootsubscription' -Filter "Filter = ""__eventfilter.name='$N'""" -ea 0
$C = gwmi -Class CommandLineEventConsumer -Namespace 'rootsubscription' -Filter "Name='$N'" -ea 0
$F = gwmi -Class __EventFilter -NameSpace 'rootsubscription' -Filter "Name='$N'" -ea 0
if ($B) { $B | rwmi; $off = $true } ; if ($C) { $C | rwmi; $off = $true } ; if ($F) { $F | rwmi; $off = $true }
if ($off) { write-host -fore 0xf -back 0xd "`n $N [REMOVED] run again to install "; timeout /t 5; return }
$P = "$([environment]::SystemDirectory)cmd.exe"; $T = "$P /q $N (c) AveYo, 2021 /d /rerase appraiserres.dll /f /s /q"
$D = "$($P[0]):`$WINDOWS.~BT"; $Q = "SELECT SessionID from Win32_ProcessStartTrace WHERE ProcessName='vdsldr.exe'"
$F = swmi -Class __EventFilter -NameSpace 'rootsubscription' -args @{
Name = $N; EventNameSpace = 'rootcimv2'; QueryLanguage = 'WQL'; Query = $Q} -PutType 2 -ea 0
$C = swmi -Class CommandLineEventConsumer -Namespace 'rootsubscription' -args @{
Name = $N; WorkingDirectory = $D; ExecutablePath = $P; CommandLineTemplate = $T; Priority = 128} -PutType 2 -ea 0
$B = swmi -Class __FilterToConsumerBinding -Namespace 'rootsubscription' -args @{Filter=$F;Consumer=$C} -PutType 2 -ea 0
write-host -fore 0xf -back 0x2 "`n $N [INSTALLED] run again to remove "; timeout /t 5
} ; start -verb runas powershell -args "-nop -c & {`n`n$($_Paste_in_Powershell-replace'"','"')}"
$_Press_Enter
#::
之后,以管理员的身份运行.cmd文件。
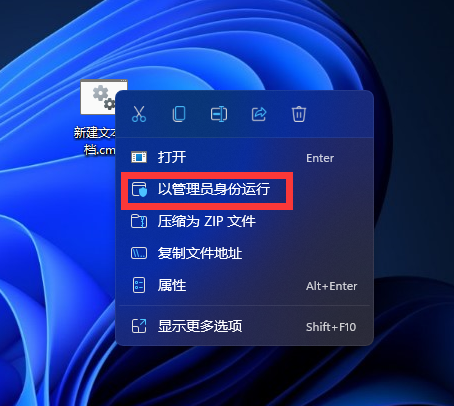
运行结束后,点击检查更新。
然后再电脑桌面新建一个空白的【AppraiserRes.dll】文件。

等待更新到8%时,电脑C盘将会多出两个文件夹。

迅速打开C:$WINDOWS.~BTSources并将【AppraiserRes.dll】文件复制到该目录即可。
以上内容就是关于小编为大家介绍的Win11更新如何修复 0x80888002 错误的技巧,有不懂的网友可以参考一下以上内容,更多系统教程请继续关注u小马:https://www.win10com.com/
